Get Yacht Clubs Manager running at your club. Book a 20-minute walkthrough.
Your committee has agreed to move the club off spreadsheets and an ageing website, and you have signed up with Yacht Clubs Manager. Now what? This post sets out a realistic first month for a new club: what to decide before anything is built, what the Yacht Clubs Manager team sets up for you, what your committee configures in the admin console, and a sensible order to do it in.
Treat it as a suggested plan rather than a timetable. Some clubs move faster because the membership categories are already settled; others spend a fortnight agreeing them at a committee meeting. The order matters more than the dates.
Who does what
There is no self-serve setup wizard. A new club starts with a discovery call with our team, where we talk through your membership categories, your events and duties, and the tools you are replacing. We then build your site and set up the parts that need technical access:
- your branding: club name, colours, logo, contact details and social links
- your domain, so the site sits at your club's own web address
- email sending, so invitations, invoices and reminders come from your club
- the location used for the weather and tide widgets
Everything else is configured by your committee in the admin console: membership types, the application form, the sign-up steps for each membership type, the Stripe connection, invoice and renewal settings, content, duty types, events, bookable resources and shop products. That split is deliberate. These are the decisions your club will want to change over the years, so it helps if the people making them know where the settings live. We run training sessions for the committee so nobody is working it out alone.
Before setup: decisions to make and things to gather
A lot of the work of your first 30 days on Yacht Clubs Manager happens away from the screen. Before you start configuring, try to have these agreed or to hand:
- Your membership types. The exact list (full, family, junior, crew, honorary and so on), and the annual price of each. This list drives the application form, the sign-up steps and invoicing, so it is worth settling first.
- How renewals should work. Does everyone renew on one club date, or on the anniversary of joining? We cover this in detail in choosing your renewal settings.
- A Stripe account in the club's name, or a named person who will create one. Card payments go to that account, not to us.
- Invoice details: the club's address, registration number if you have one, bank details for members who pay by transfer, and your usual payment terms.
- Your current member list in a spreadsheet, even a messy one.
- Who on the committee needs admin access, and to what. A treasurer needs invoices; a social secretary may only need news and events.
- Content to carry over: the committee list with photos, member documents such as bye-laws and safety policies, recent news, sponsor logos and a few good photos.
Week one: membership types and the application form
Start with membership types, because almost everything else refers back to them. Add each type in the membership section of the admin console, then give each one its price in the invoice settings by linking it to an invoice category. A membership type with no price will not be invoiced automatically, and the console warns you about this when you invite members, but it is easier to get right now.
Next, the public application form. You choose which built-in fields appear, whether to ask for a proposer and seconder, and any custom fields your club needs, including file uploads. The form can be the same for every membership type or different per type.
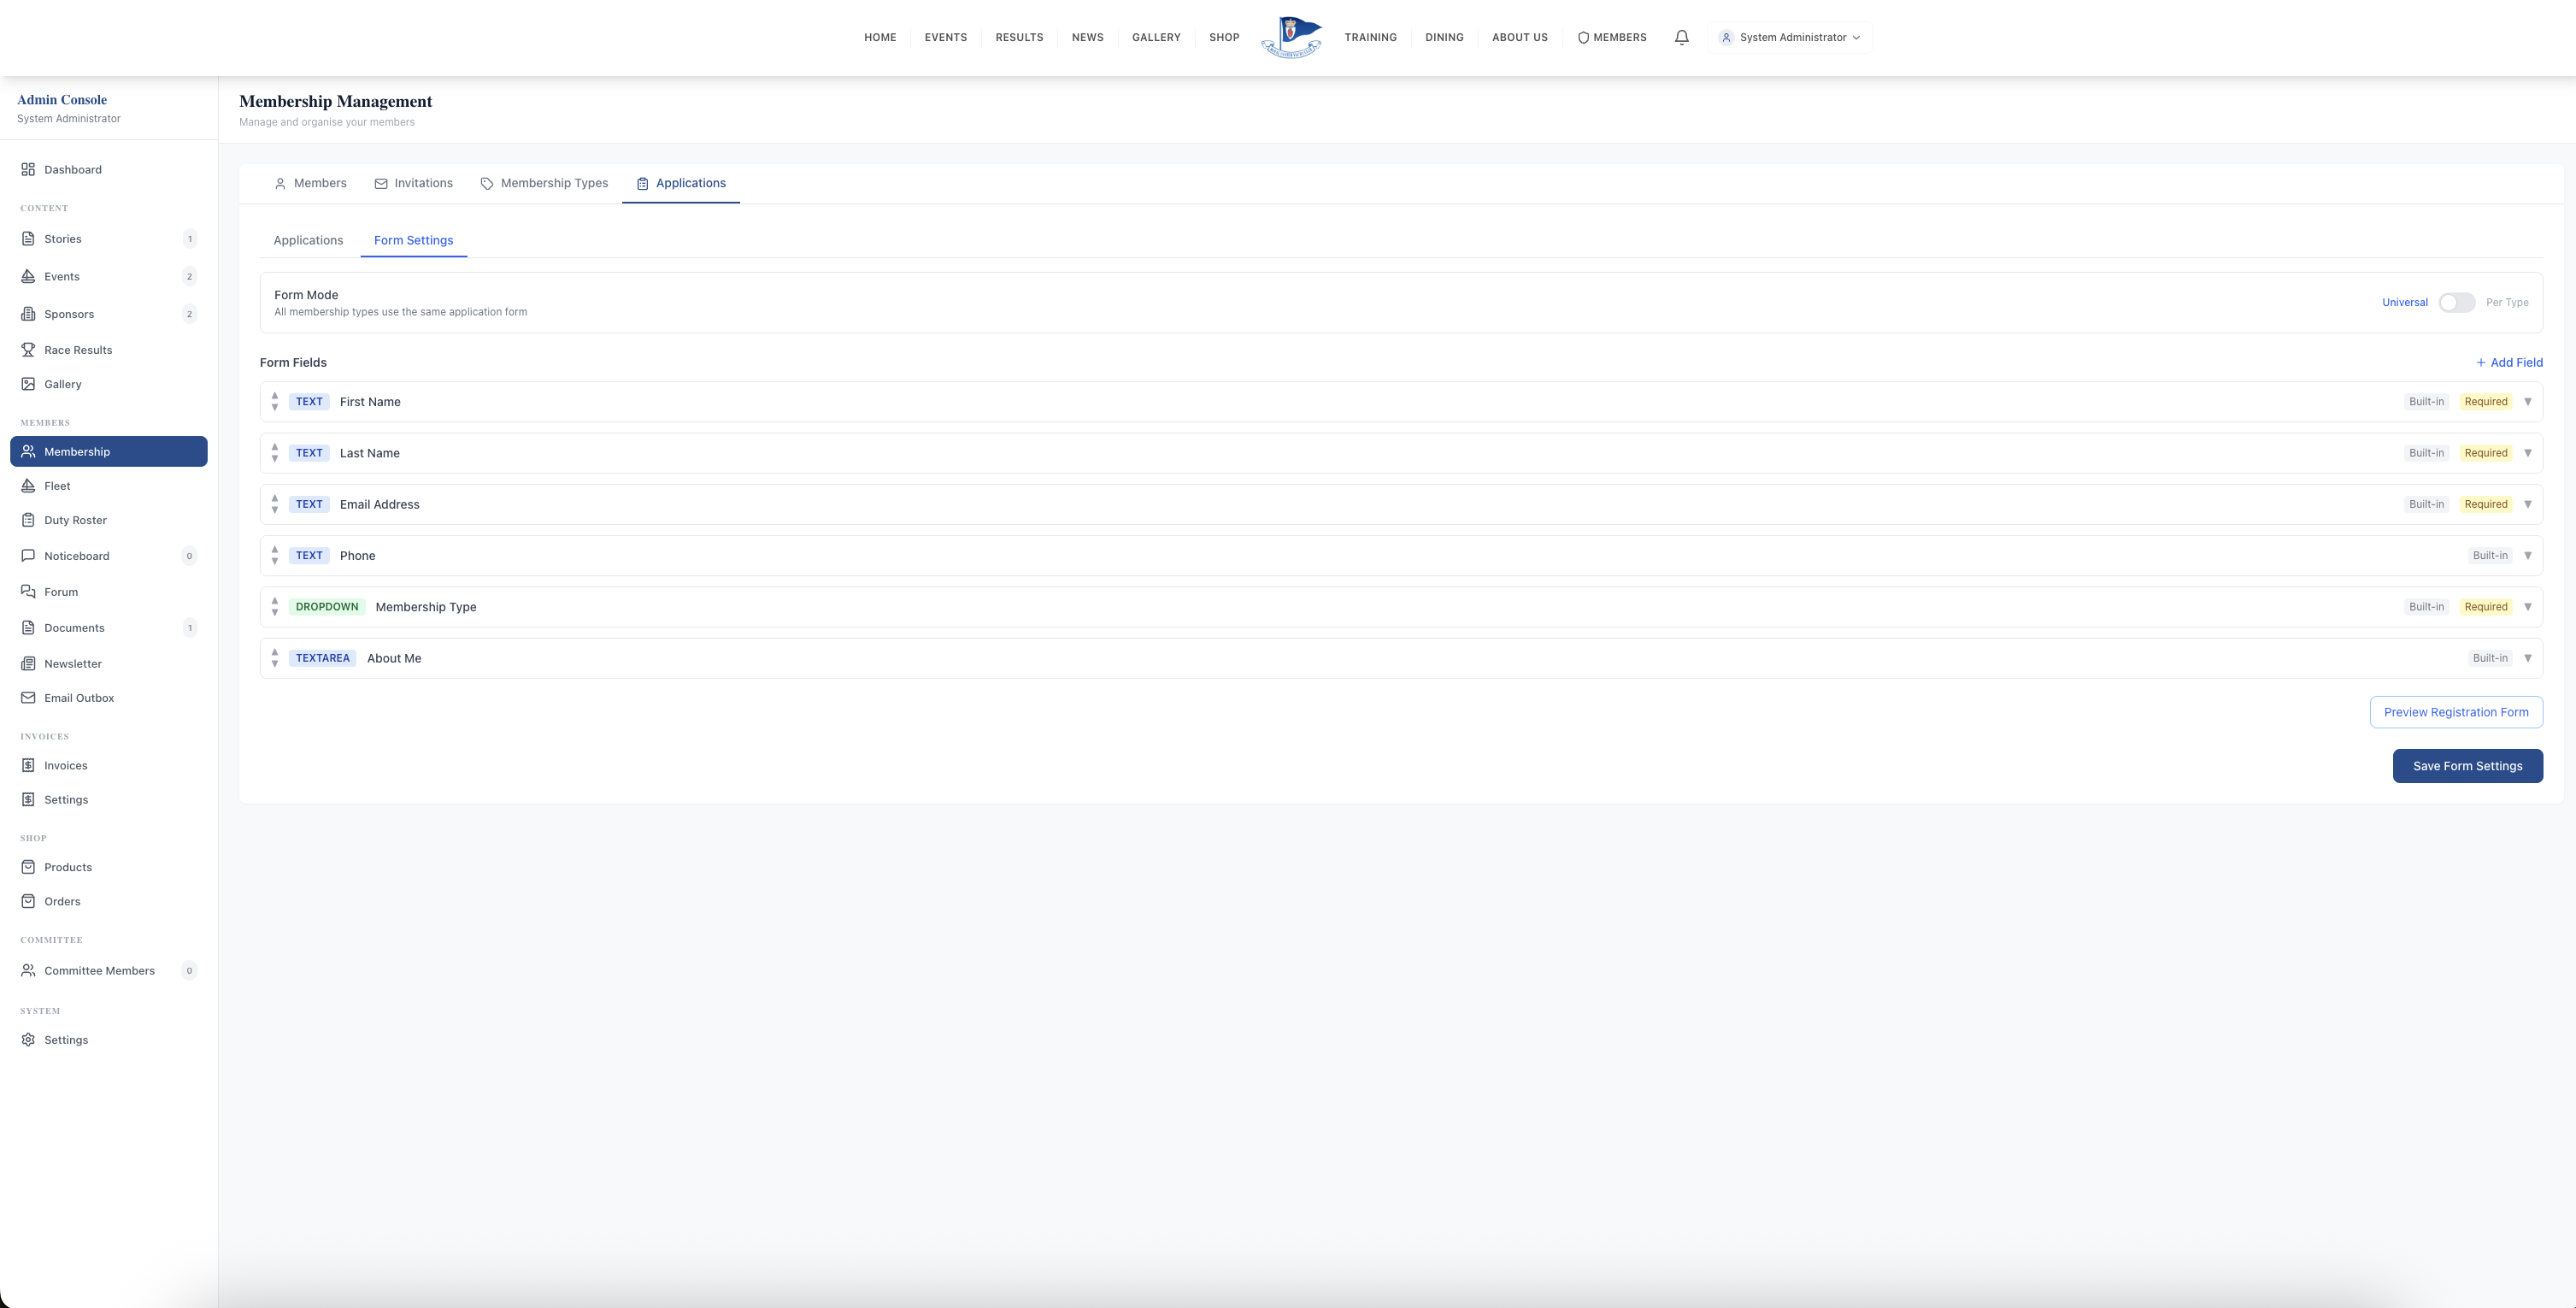
Then set the sign-up steps. When an applicant is accepted or an existing member is invited, they complete a step-by-step sign-up: personal details, family, emergency contacts, qualifications, boats, an insurance acknowledgement and any sections of your own. For each membership type you decide which steps are hidden, optional or required. A junior membership probably does not need a boats step; a full membership might require it. The membership secretary's guide to applications goes through this in more depth.
Week two: Stripe, invoices and renewals
Connect Stripe early. Until the club's own Stripe account is linked from Settings, the platform will not let you raise invoices or put a price on events and bookable resources, because the money would have nowhere to go. Connecting takes a few minutes: you sign in to Stripe (or create the club's account), authorise the link, and you are returned to the admin console. The detail is in taking card payments at a sailing club.
Then work through the invoice settings in this order:
- Club details and bank details, which print on every invoice PDF.
- Default payment terms and which payment methods to offer by default.
- Payment reminders: whether to email members before an invoice falls due.
- Renewal settings: club date or anniversary, and which automation to turn on. All of the renewal automation is off until you switch it on.
Week three: content, permissions and the extras you need
With the money side in place, turn to what members will see. Add the committee page, upload member documents into categories, publish two or three news stories so the site does not look empty, and add sponsors if you have them. A site that already has this season's documents and a welcome story makes a much better first impression on members than an empty shell.
This is also the time to give committee members their own admin permissions rather than sharing one login. Each person gets access to the areas they look after, and actions are recorded in the admin actions log. See committee roles and permissions.
Then add the optional pieces only if your club uses them:
- Duty types and the first batch of duties, if you run a duty roster.
- Events for the coming season, with documents and registration where needed.
- Bookable resources such as a crane, hoist or club boats.
- Shop products for burgees, clothing and the like, sold for collection.
You do not need all of these on day one. Many clubs launch with membership, invoicing and news, then add events and the duty roster once members are signed in.
Week four: a soft launch, then invite everyone
Before inviting the whole membership, invite the committee and a handful of willing members first. Ask them to complete the sign-up, check their profile, open a test invoice and tell you what confused them. You will almost always find a sign-up step that should have been optional, or a document in the wrong category.
When you are happy, bring everyone else in using the three-column spreadsheet invite: first name, last name and email. You review the list before anything is sent, and each member then fills in their own details. How to prepare that list is covered in moving your members off spreadsheets.
Tell members it is coming. A short note in your last old-style email, or a word at the bar, explaining that an invitation will arrive and what it is for, makes a real difference to how many people act on it.
After the first month
By the end of a month like this, your members are signing in, the committee has its own access, and invoices can go out with a card payment link. The next decisions tend to be about the season: setting up the duty roster, opening event entries, and deciding how much of the renewal process to automate before your renewal date comes round.
To see how the membership side fits together, read about member management and custom application forms, or look at the wider picture of yacht club software. If you would like to talk through your own starting point, get in touch.
Like the read? See it running with your club's data — book a demo.